
Okay, so, your cast iron has some rust on it — and/or some pitting. Maybe even more than some. No one is here to discuss why that happened, just how to fix it.
Hopefully a little work on your end can save it. These quick steps are your best bets.
Stop cooking;
Start inspecting.
First and foremost, stop using the pan. Additional use (or misuse) is going to cause more harm than good. Two other thoughts to emphasize this step: why would you eat something with rust in it, if you didn’t need to? Also, whatever was being done to get here was not right. Don’t do more of it.
Part of this step is an honest inspection. If there is not major pitting, you are probably still in business. Take the time to give the pan a look over. If there are deep pits it is unlikely that you are going to get this on your own. There are plenty of people who can refinish cast iron and maybe they can help you here, but a deep-pitted cast iron is a decoration not a dining option.
Assuming you are good to keep going, let’s find the next S:
Soak your pan.
This is perhaps one of the few times that you are going to soak your cast iron.
Plug your sink and create as close to a 50-50 mix of white vinegar and water as you need. There is not a measurement of ingredients at this point, other than try to be 50-50 in volume to cover all of the rust on your pan.
Similarly there is not a timer to set, you will have to pay attention here.
You will want to soak the cast iron for at least one hour. If there is a thin layer of rust, that window has been the conventional wisdom. If there is more rust you can go as long as eight hours — though that would be rare. Also, note, that as the mixture eats through the rust it will start to dissolve your cook surface. Just being under eight hours is not a safe window.
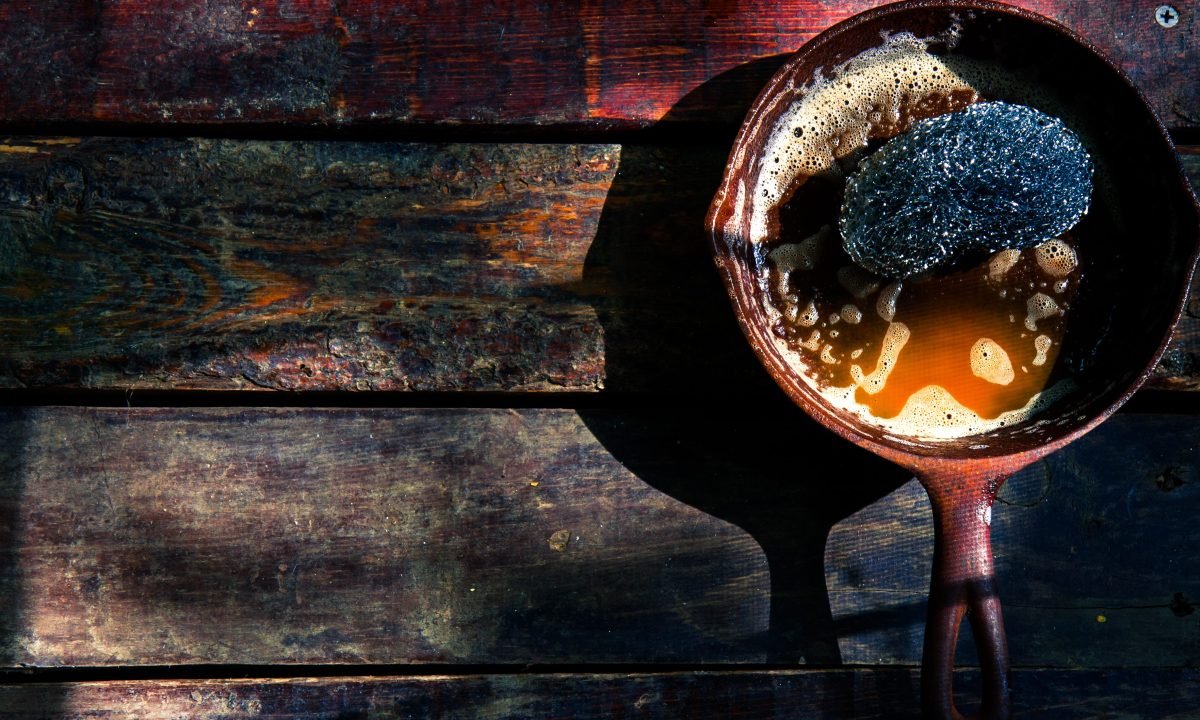
Scour it clean.
‘Soak’ and ‘scour’ being in an article about cast iron shows how difficult this situation is. In a normal instance, you are not going to scour your cast iron.
The vinegar-water mixture has been drained and rinsed. It is time to add a small stream of warm water, very fine steel wool, and a small amount of dish soap into the mix.
Gently work a lather and continue to scour until you are back to a raw cast iron surface. Much like the worry of pitting, be careful not to make deep scratches. The naturally non-stick benefit of cast iron is eliminated with scratches and pitting. If you make more of a mess here, the skillet will not survive.
Season. Again.
At this point it is a rescue mission and not a regular origin story. All of the tips to season a cast iron get thrown to the side for survival.
You will want a high temperature cooking oil — I always recommend grapeseed oil for this step. Use a paper towel and rub grapeseed oil all over the pan. All over. The outside walls, the handle, the cook surface, everything. It is also smart to so pour a thin layer into the pan. From there put the cast iron into the oven, set at 350°F, and let it bake for an hour.
After that hour, let the oil cool and then drain the excess. Using another paper towel, re-apply another coasting of oil to the pan.
Store correctly.
You do not want to look this article up ever again. So make sure that you are not undoing your efforts.
If cared for — and stored correctly — cast iron is going to outlast maybe anything you own. The storage of cast iron is as important as its care. If you can keep it in a dry location you have a better chance of longevity. Damp locations invite rust and oxidation.
Maybe you have been a perfect cast iron owner leading up to this, just neglected storage. With the fix in place, you are set.
Then again, maybe you haven’t. If not, you need to check out “4 Things to Avoid; 1 Must Do for Cast Iron” and if you want to go another step, learn “What to Cook FIRST In Your Cast Iron.“


Good advice but, generations before me have treated cast iron as a hardened warrior and not something tender. The cast iron is still going strong. Clean, oil, protect from water.
I have found it necessary to do this process each and every time the pan is used. Very labor intensive and time consuming. Food always sticks to the pan and hard to remove without soap and water scrubbing. There must be a lot more to this than is published. What is secret, oil, heat to avoid this?
Hey James, great question.
You shouldn’t need to do all of that each time.
Check out things to NEVER do to cast iron and that will help. https://outdoors-com-develop.go-vip.net/4-things-to-avoid-1-must-do-when-caring-for-cast-iron/
It is also potential that you did not season your cast iron properly — and thus have a difficult cycle created. If you do not have good seasoning on the pan start here: https://outdoors-com-develop.go-vip.net/the-food-you-should-always-cook-first-in-new-cast-iron/
Also — grapeseed oil. Always. Very high heat tolerant.
I do the seasoning technique 6 times. Afterwards, I only clean with hot water, dry immediately, and wipe down with oil.
Should food become stuck to your cast iron while cooking, the first clean up step is to boil water in the pan. The stuck food will mostly lift off and the rest will soften so you can scrape it off with a flat end spatula or a ball of foil. Try it!